Getting Started
Cooklang is a lightweight, open-source format for writing and managing recipes in a structured, human-readable way. Your recipes are just text files, meaning you can store, edit, share and sync them across all your devices without being locked into a specific app or service.
Here's what a basic recipe looks like in Cooklang:
When processed using apps, this recipe extracts ingredients while keeping the instructions readable.

1. Try It Right Now
No installation needed — try Cooklang instantly:
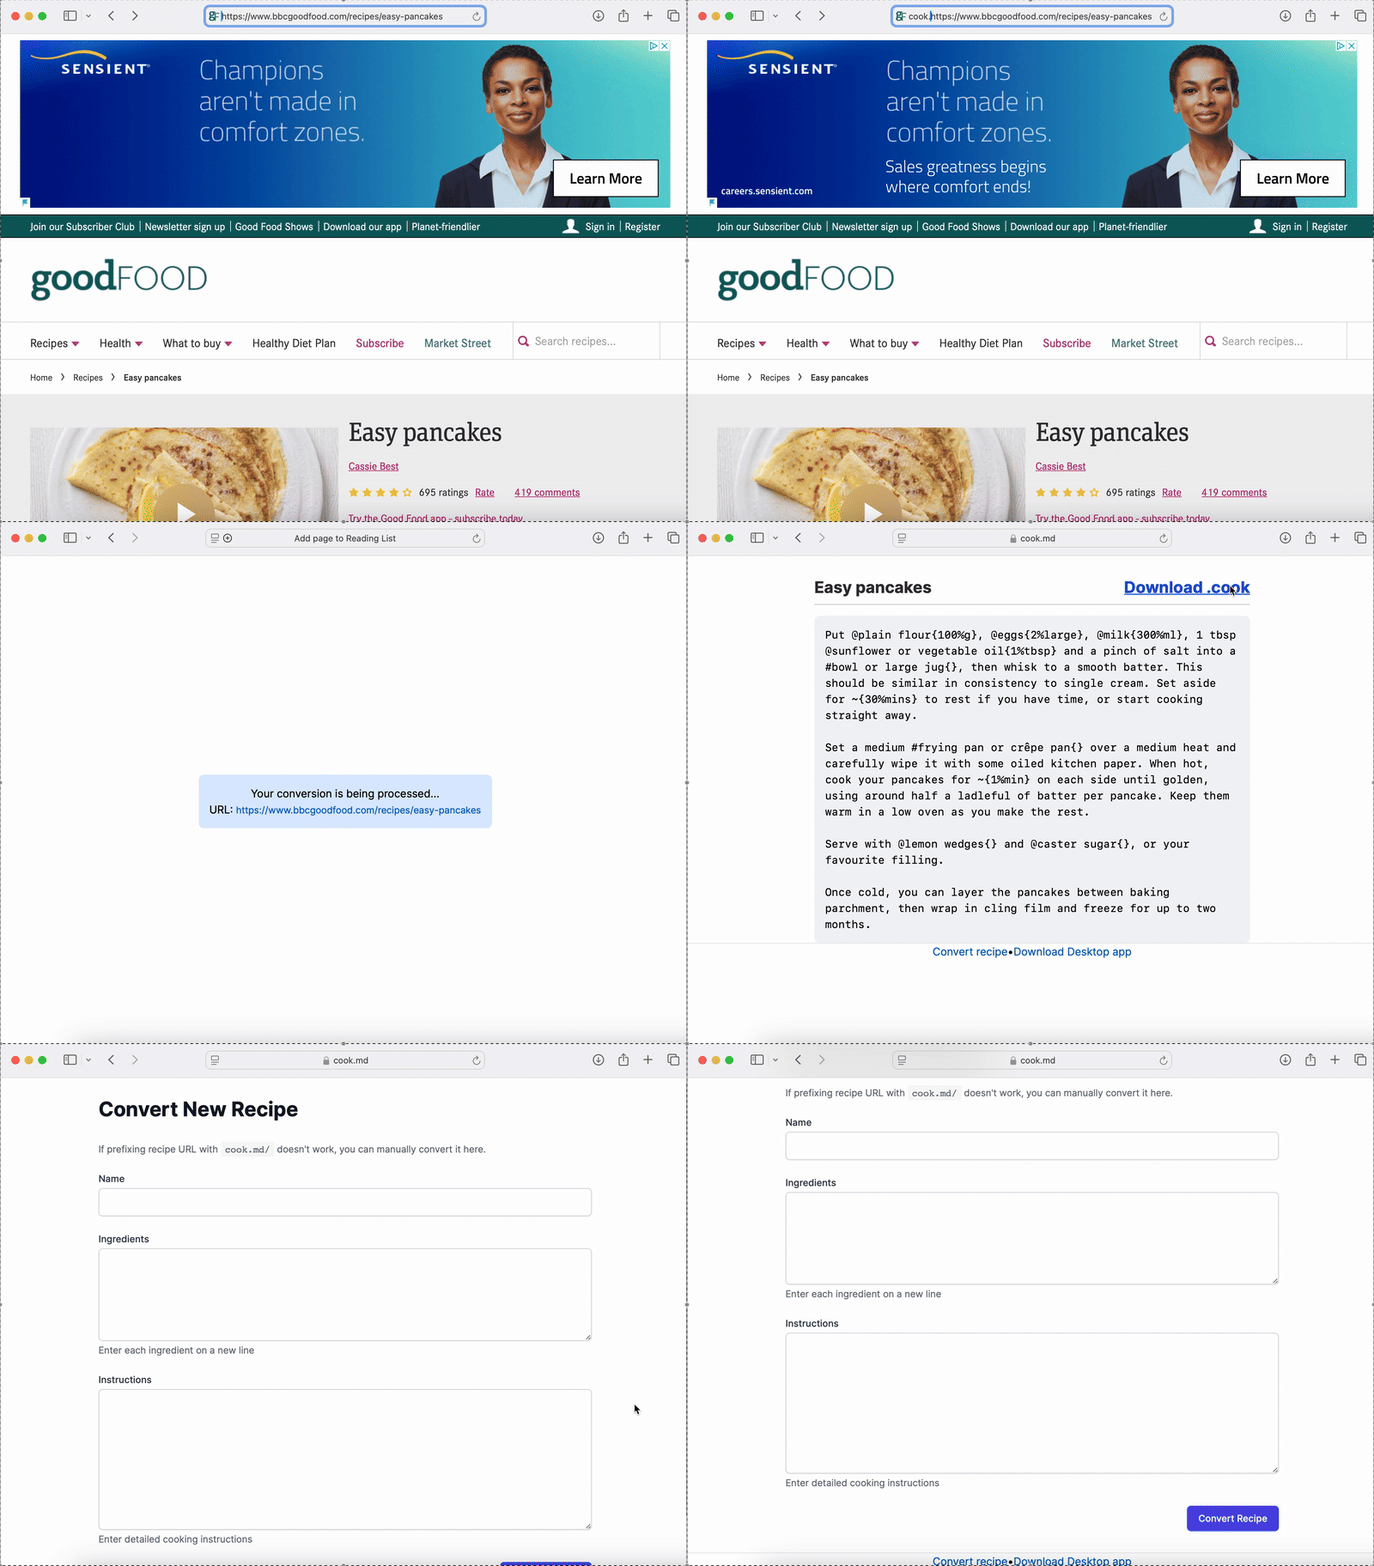
- Convert any recipe from the web: add
cook.md/before a recipe URL in your browser's address bar (e.g.,https://cook.md/https://bbcgoodfood.com/recipes/easy-pancakes/).

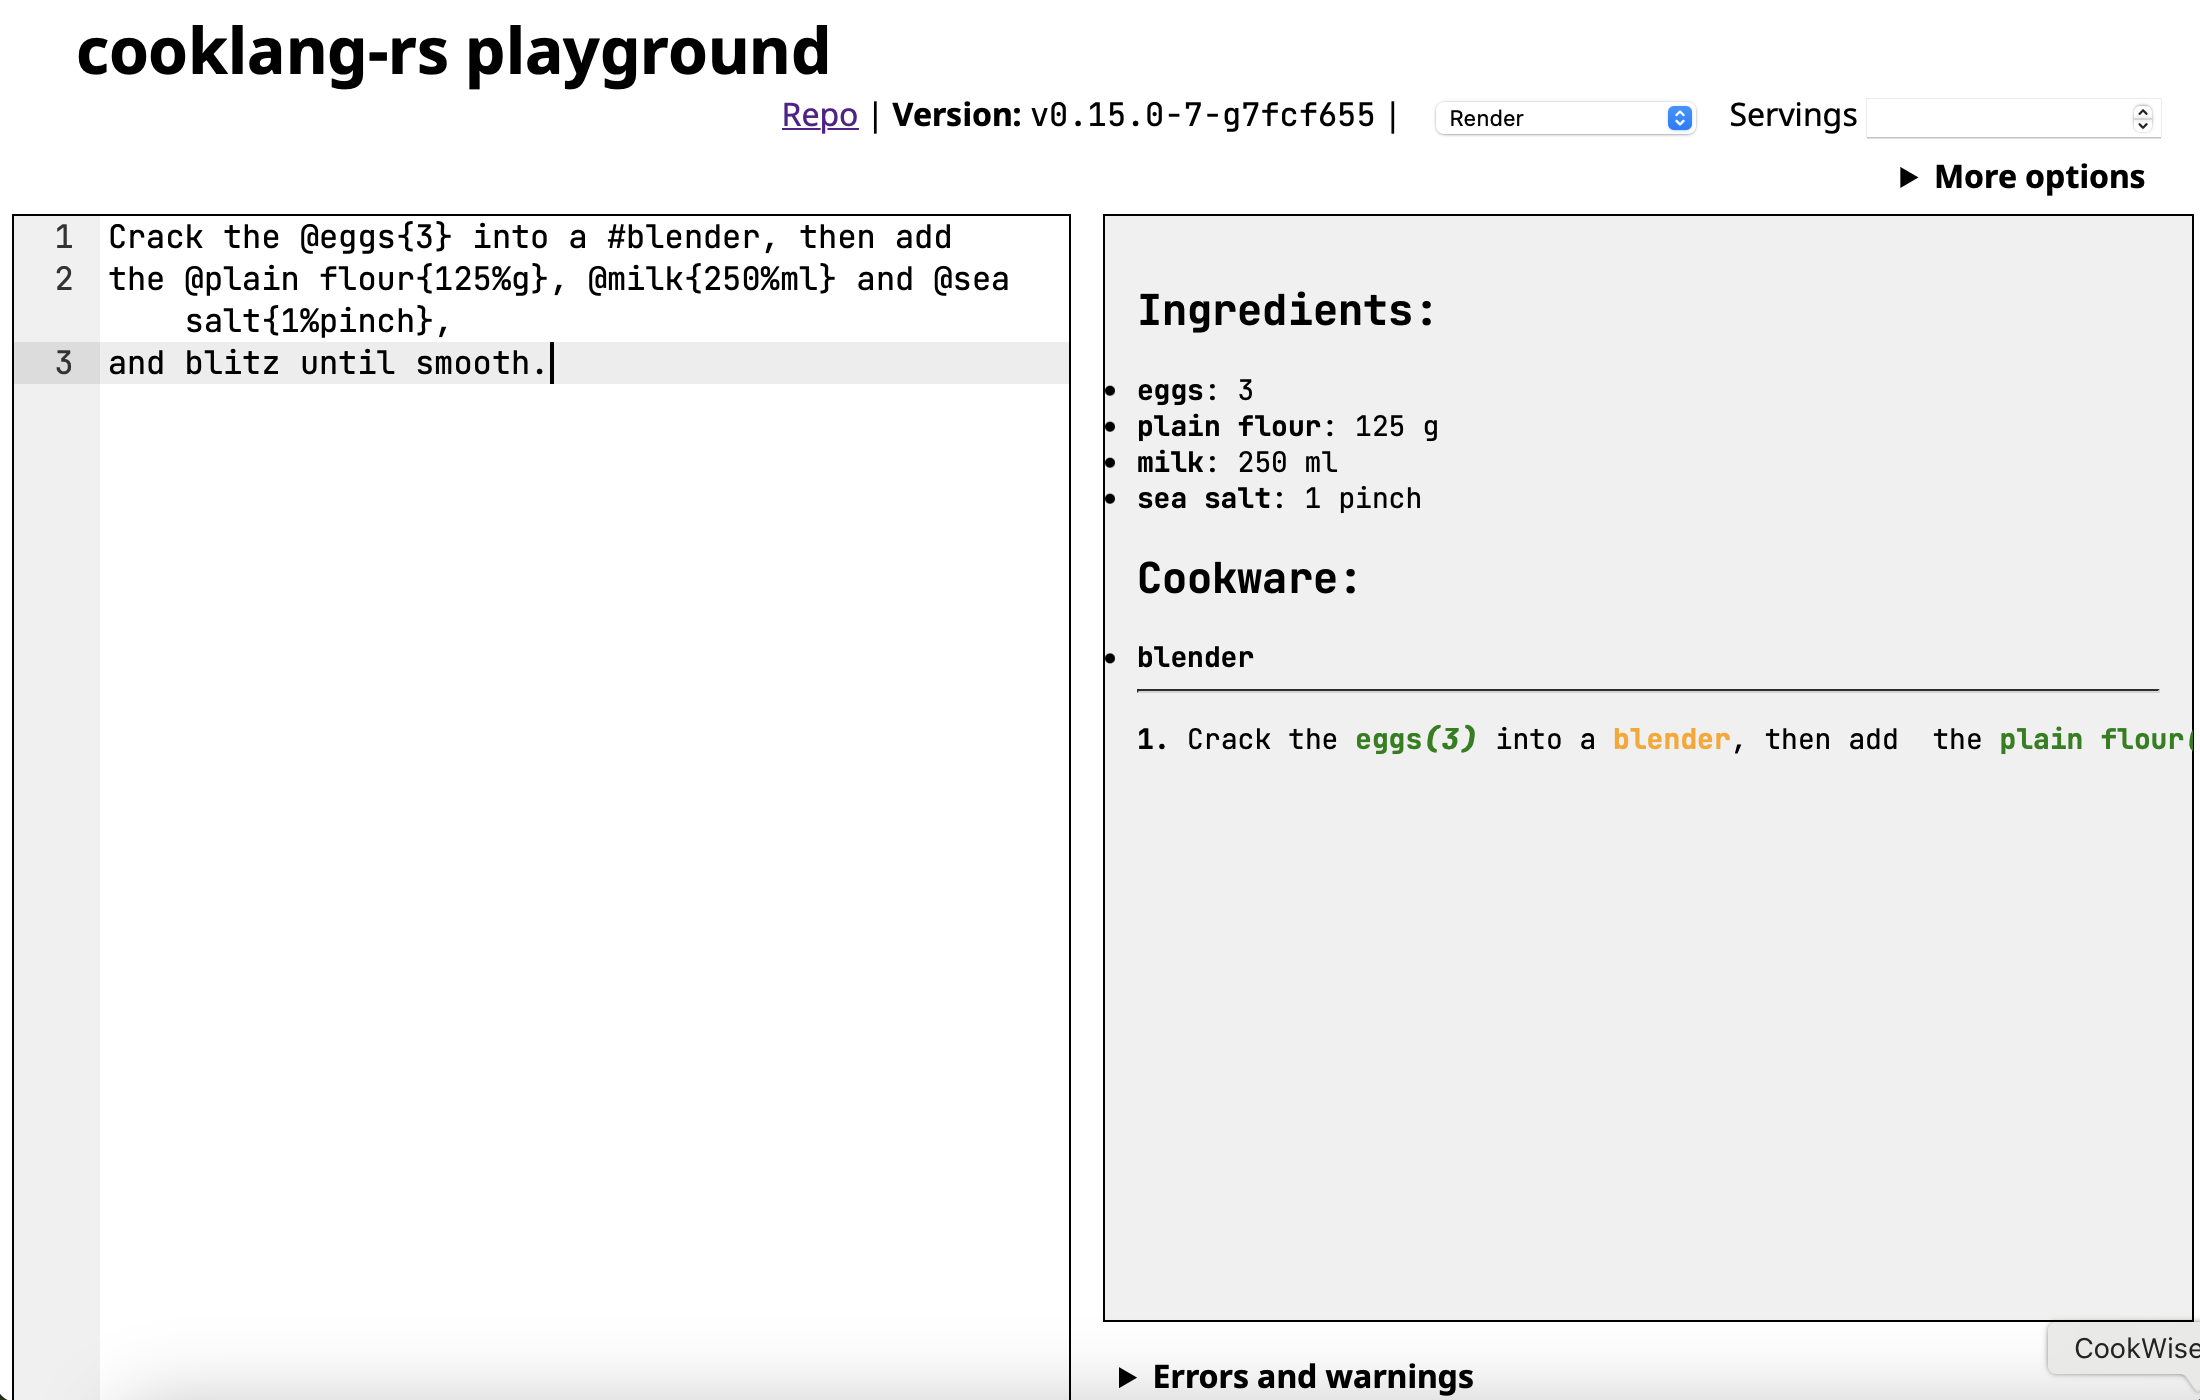
- Experiment with the syntax: open the Playground to write and preview Cooklang recipes interactively.

2. Start Cooking With the App
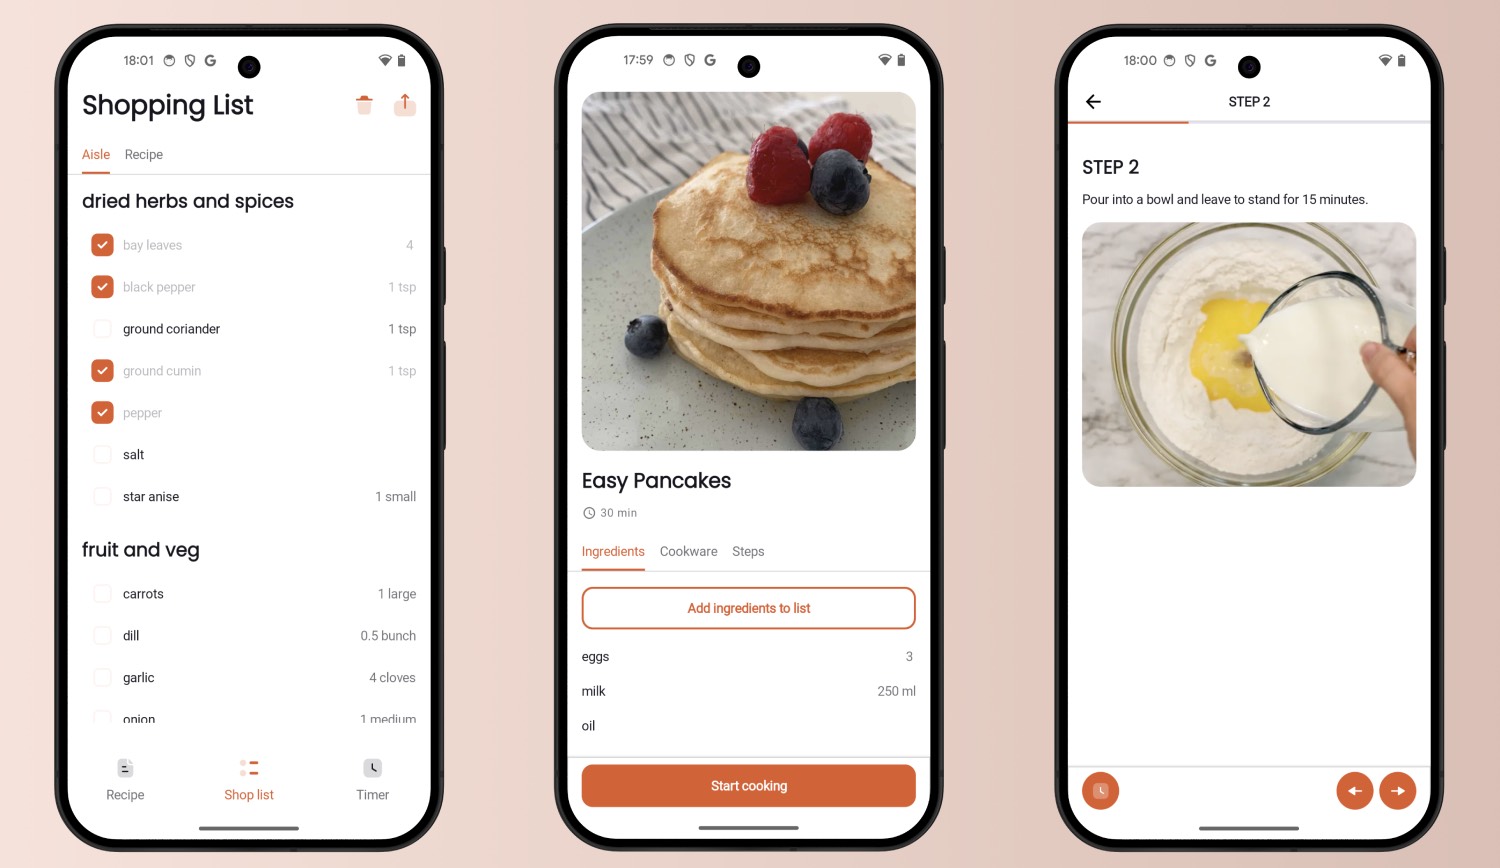
Download the Cooklang App from the Google Play Store or Apple App Store. Open the app and choose to sync recipes with CookCloud, iCloud, or a local folder.
If you're using the iOS app with iCloud sync, it will create a folder in iCloud Drive called CooklangApp where it expects to see recipes. The sync method can be changed later in the app settings.
Syncing Across Devices
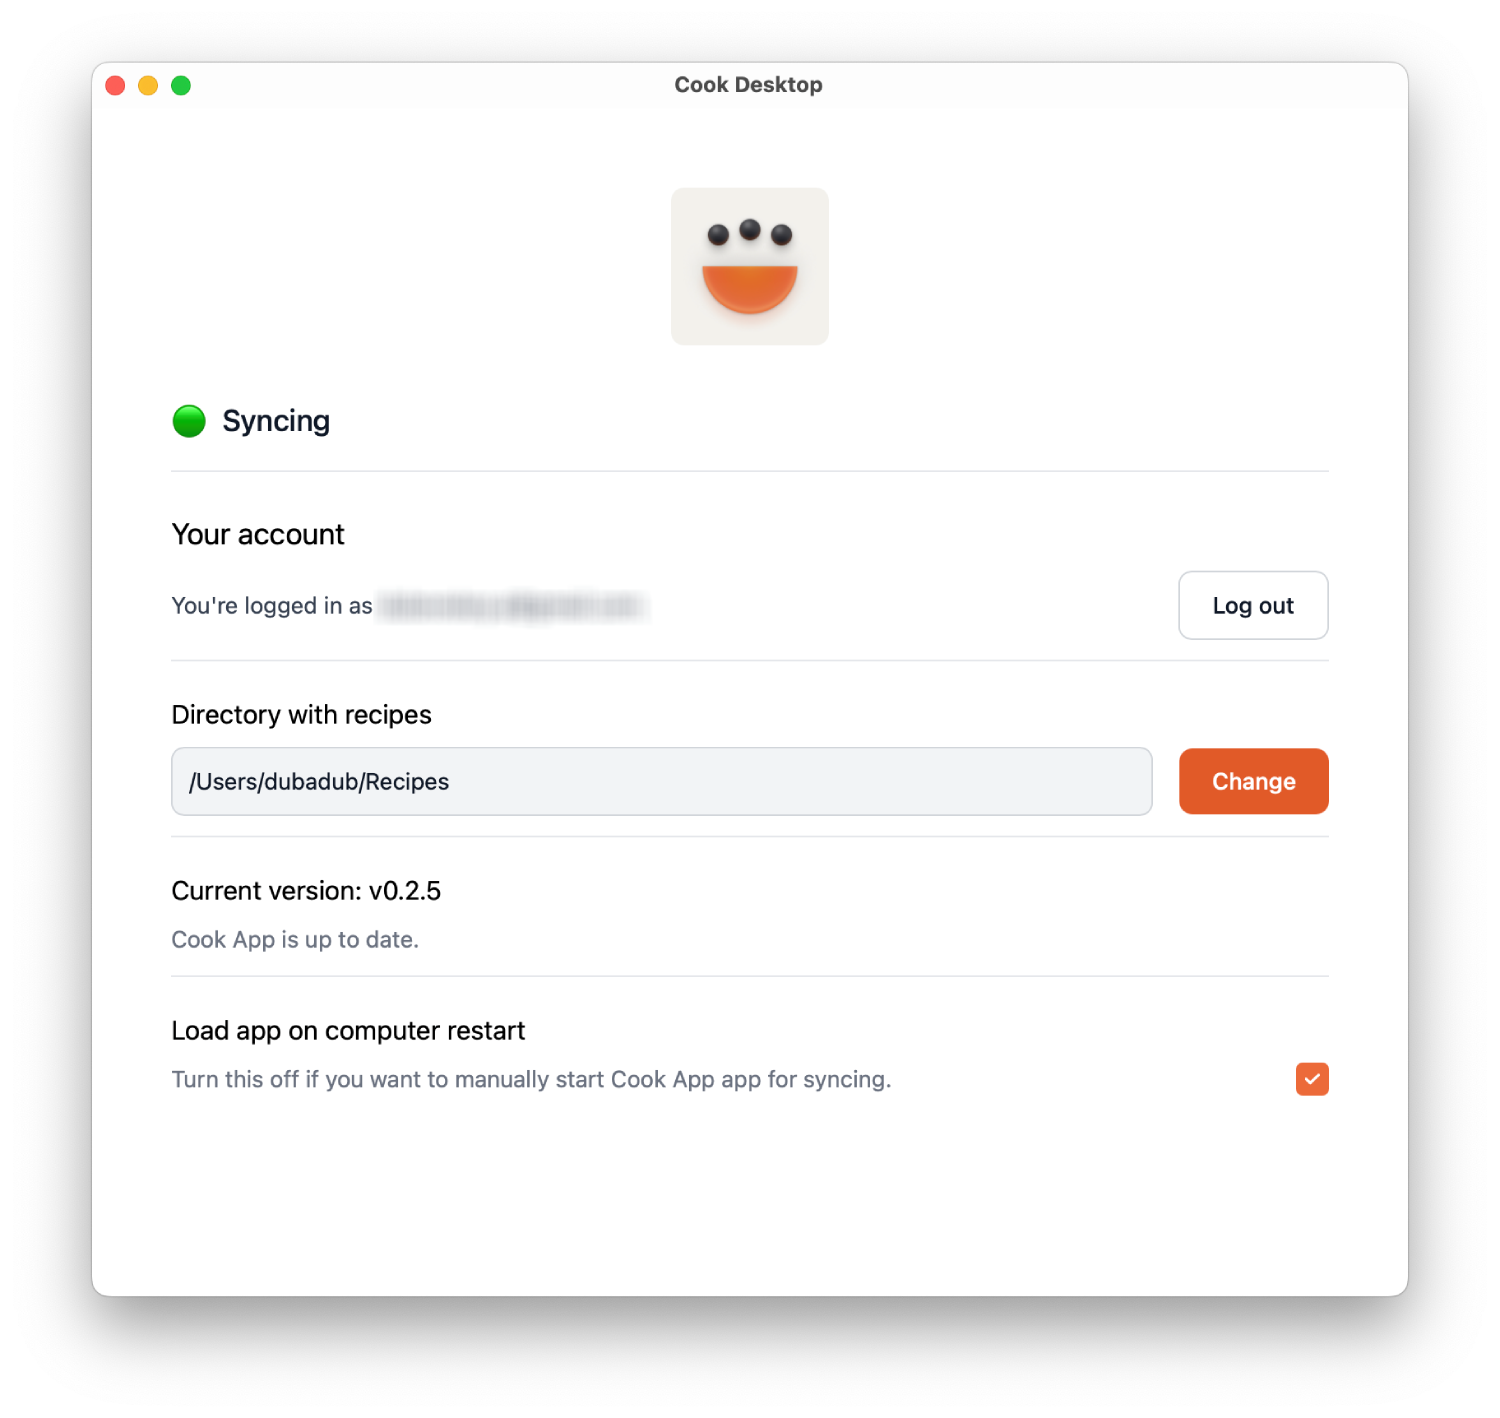
To keep recipes in sync between your phone and computer, install the Cook Desktop App — a lightweight sync agent that runs in the background. Point it at your recipes folder and sign in.

Cook Cloud is a built-in sync service that works across macOS, Windows, Linux, iOS, and Android — no third-party cloud setup required.
3. Write Your Own Recipes
Cooklang recipes are plain .cook text files. The syntax is simple: @ names ingredients, # marks cookware, ~ sets timers, and -- adds comments. Multi-word ingredients end with {}, quantities go inside {}, and units follow %.
For the full syntax reference, see the Cooklang specification. To learn about practical use cases like meal planning and shopping, see use cases.
Editor Setup
Syntax highlighting makes writing recipes easier. Set up your preferred editor:
- VS Code (Recommended): Install the Cooklang extension from the marketplace.

- Vim/Neovim: Add a Cooklang syntax file for highlighting.
- Sublime Text: Use a Cooklang syntax package.
- More options: See syntax highlighting documentation.
Obsidian Plugin
You can also manage recipes alongside your notes in Obsidian with the Cooklang Editor plugin.
4. Grow Your Collection
Organize Your Recipes
Keep recipes organized by folders (e.g., breakfast/, dinner/, desserts/). You can use multiple nested folders if you have many recipes.
Configure aisle.conf for Shopping
Add config/aisle.conf to your recipes folder to categorize ingredients by shopping aisle, making grocery trips more efficient. Learn more about this here.
Join the Community
Find curated recipes, share your thoughts, or ask for help:
- The Cooklang Recipe Hub
- The Awesome Cooklang repository
- Community discussions and Discord
5. Power Tools
Command-Line Interface (CookCLI)
CookCLI is a command-line tool for automating your recipe workflow. It follows the UNIX philosophy — each command does one thing well and can be combined with other tools.
See the cook server web UI in action at demo.cooklang.org!
Install from GitHub Releases, or on macOS: brew install cookcli. For the full CLI reference, see the CLI documentation.
AI-Powered Recipe Management
If you use an AI coding assistant like Claude Code or Codex CLI, you can supercharge your workflow with Cooklang Skills — AI skills that let you create, convert, validate, and manage recipes using natural language.
Some skills work standalone (create-recipe, convert-recipe, organize-collection), while others benefit from having CookCLI installed.
If you don't use these tools, try Cookbot — built specifically for working with Cooklang recipes and plans.
What's Next?
- Check out the best practices guide.
- Open an issue in the Cooklang GitHub repository.
- Join us on Reddit, Discord, and Twitter.
- Subscribe to the newsletter!